
We have a 2018 Pleasure-Way Lexor TS. Many of the Pleasure-Way models have a rear sofa that converts to a bed using a power recliner. Today’s project was lubricating the power sofa cables and gears.
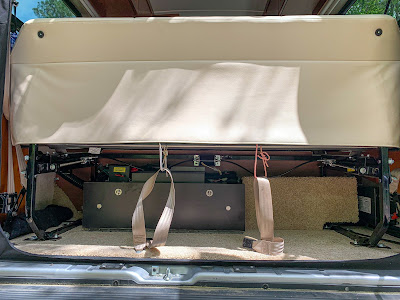
Here’s the view of the couch from the back of our 2018 Lexor TS. We began the annual maintenance with the couch in the full, upright position.
The procedure is based on a “Get Your Phil Friday” tip by Pleasure-Way’s legendary Phil Nickel. Members of the Pleasure Way Owners Group on FaceBook can find 40 of his tips at Phil Friday.

Tools needed are spray Silicone lubricant, sewing machine oil*, a 3/4″ wrench, paper towels, and something to protect the carpet. We used plastic to keep the oils and grease from staining the carpet.
*Unable to find the 3M 5-Way Plus lubricant mentioned in Phil’s tip, we used sewing machine oil after asking Phil at one of the Sarasota Rallies what to use as a substitute. A reader noted that the 3M product is now available from some resellers on Amazon.

Disclaimer: I’m not an RV Tech, just sharing how we lubricated our sofa mechanism.

Zooming in on the drive housing, the 3/4″ nut is apparent here.

It takes very little effort to loosen the nut. After half a turn, the wrench can be removed and the nut can be removed by hand.

Once the nut is loosened from the drive housing, the cable can be pulled straight out.

With the cable removed, put a paper towel behind the long screw gear before spraying the gear with silicon.
Next, lubricate the cable by dripping a little sewing machine oil into the end. Hold the cable up higher than the motor, so the oil can flow down the length of the cable.

Spray some silicone into the square hole in the drive housing.
If the end of the braided cable and the square hole in the drive housing don’t align, you can move the gear a tiny bit with a square head Robertson #2 screwdriver. If you do that, move it as little as possible so that the two sides of the couch stay in alignment.

Repeat the process on the driver’s side, where the red circle identifies the nut.

Remove the nut, spray the worm gear with silicon, drip some oil into the cable, spray into the drive housing, and reattach and secure the cable with the 3/4″ nut.
Finally, run the sofa up and down a few times to distribute the silicone lubricant.
Clean-up and the job is complete. Hopefully, when done on an annual basis, this will extend the life of our sofa’s power drive mechanisms.

Bonus: Did you wonder what was behind the passenger side carpeted barrier? It is held on by velcro and can be removed by gentle pulling it towards the rear of the van.

The charger/converter lives back there. You might hear the fan running when plugged into shore power as it charges the batteries.
Now you know it is easy to access if it ever needs to be replaced.
Thanks for reading. Please leave suggestions in the comments if you have found easier ways to lubricate on your power sofa.
Leave a Reply