
After receiving a $275 quote at the Cummins Onan Service Center in Greensboro, NC we elected to do our own oil change.
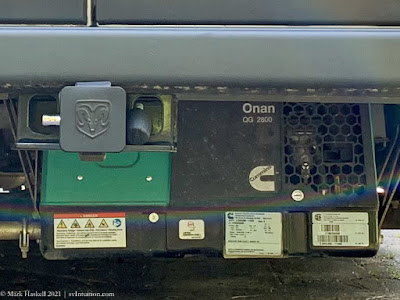
A CD from Onan came with our RV, but it didn’t include the manual for our specific generator. We found the manual for our Onan QG 2800 HGJBB (Spec A-B) here.
Other Onan manuals are available on-line at on the Cummins website.

For a basic start we read the manual instructions for checking the oil level. The dipstick was accessed behind the cover with the Cummins symbol on it. A quarter, or a flat head screwdriver as all that was needed to unlock the panel. This particular generator is checked, after unscrewing the dipstick, by reinserting it without screwing it down. The oil level turned out to be fine. If we had added oil to the level indicated with the dipstick screwed down, the oil level would have been too low. After checking the level, we threaded and re-tightened the dipstick. We’ve read multiple reports of people finding loose caps and low oil levels. It’s easy to forget to thread and tighten the cap after checking
the level.

Tools and Supplies
Moving on to the actual oil change, we read all the warnings in the manual. We could get burns, shocks, cancer, or crushed under the vehicle. Please read your manual if you choose to change your own oil.
Sufficiently forewarned, we set out to gather our supplies.
– 9/16 inch Socket
– Torque wrench
– Fresh Oil
– Oil Pump
– Plastic drop cloth for the driveway
– Receptacle for old oil
(Folgers 11.3 oz coffee container)
– Gloves
– Rags
– Blocks and ramps to raise and secure the back of the van.

This oil pump was key to not making a mess. They are available in many auto parts and marine stores. Amazon had this one for $11.68

Changing the Oil
Our driveway has a natural hump from a tree root. Parking on that raised the driver’s side of the van. We raised the passenger side to match with 2×8’s and leveling blocks, being sure everything was rated to safely hold the van’s weight. We blocked the front wheels and set the parking brake to insure the van wouldn’t roll.
Following the manual instructions, we run the generator for about 10 minutes to warm up the oil. Much more and it would have been too hot to handle.
Once the oil was warm, we turned off the power to the DC power so that the generator couldn’t start while we were working on it.

Draining the Oil
Here’s our skid plate and drain plug, looking up from underneath. The skid plate has been doing it’s job protecting the generator. I do wish there was a little more ground clearance underneath our van.
Reaching that drain plug was the hardest part of changing the oil. We placed a wide mouth coffee can underneath it to hold the drained oil.
After years of changing oil in diesel engines mounted in small compartments in sailboats, we knew the next step was to put on gloves because it was about to get a little messy.
Actually, with a 9/16″ socket, unscrewing the drain plug was easy, and the plug didn’t even fall into the coffee can.

Once the drain plug was out, we unscrewed the fill cap. Doing this allowed more of the oil to drain out. The fill cap is circled in red in this photo.
While waiting for the oil to drain, I cleaned the drain plug with a rag and put a little bit of fresh oil on the threads
When the oil stopped dripping, I reinstalled and tightened the drain plug with our torque wrench. The manual specified 5-10 ft-lbs, which was just a bit over hand tight.

Replacing the Oil
The oil fill on this generator is the dip stick hole. It isn’t easy to access with a funnel and bottle, so we used the small pump mentioned earlier.

It was easy to remove the cap on the bottle and replace it with the pump, specifically designed for oil and transmission fluid bottles.
Conveniently, the side of bottle had a clear space marked in ounces and liters. We pumped a little less than the recommended oil capacity (ours is 0.6 liters) into the generator.
After checking the oil level by resting the cap in the hole, not tightening the threads, I found that we had over done it. I ended up having to pump a little back out. Next time, we will pump less and check the level earlier.

After reinstalling the cap, and tightening it down, we ran the generator for a few minutes before checking the oil level again. It looked good, so we tightened the cap down and reinstalled the cover. After that we rolled the van off the ramps and took the van out for a run to the local waste disposal site to deposit the used oil for recycling.
Once home, we celebrated saving over $200, and felt good knowing the job was done with care.
P.S. A few weeks after our oil change we noticed that our neighbor’s car was being hoisted onto a flatbed truck. Asking what had happened, they vented a tale about their son taking the car to a local lube shop for an oil change. The car sounded unusually loud on the way home and it turned out that the oil hadn’t been refilled! Sometimes, it is better to do a job yourself, just for peace of mind.
Leave a Reply