Asking owners for their preferred method of winterizing, the most common answer was “stay in Florida.” For most of us, that isn’t an option so we need to protect our rigs. Though we could take our Lexor to a dealer for winterizing, we have found that no one cares as much about our rig as we do, so we prefer to do it ourselves.
updated 2022/11/09
There are good instructions in the Pleasure-Way Owner’s Manual, but for someone who hasn’t winterized before, a few more details and additional photos might make it easier.
Disclaimer: I’m not a professional, nor do I play one on TV, so consult your owners manual and follow these instructions at your own risk.
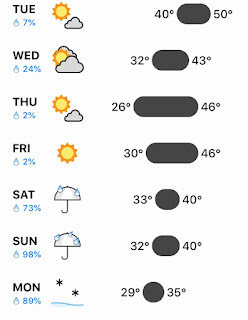
Here’s the forecast that had us gathering up our winterizing supplies.
If you have an older model, we did a similar set of instructions for our 2014 Plateau TS. Click on the link to go to that model: The Link.
1) Gather Tools and Supplies
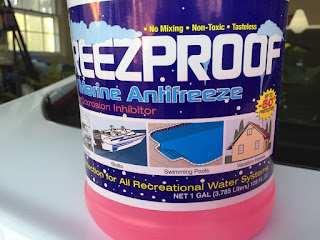
1a) RV Antifreeze
Buy two of the gallon bottles of a non-toxic pink colored RV or Marine antifreeze.
1b) Phillips Head Screwdriver #2
Find one of these PH2 heads, hopefully not a rusty one made in China like ours. You will use it to remove the access door to the water heater.
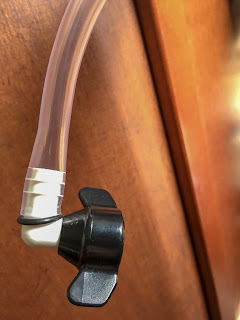
1c) Winterizing Siphon. We made our own with hose and an adapter. Four feet of hose is plenty, but our Lowes only sold it in twenty foot lengths.
This right angle adapter is easy to screw onto the pump inlet. Find one at your local rv dealer or order a Shurflo 244-3926 Elbow Adapter online.
Push the hose onto the barbed end of the adapter and you have made your very own winterizing siphon.
2) Lighten Your Load (Drain your tanks)
Go empty your grey and black waste tanks. You know how to do this and no one wants to look at those pictures. Give the tanks an extra rinse for the last time this season.
3) Drain Your Freshwater Tank
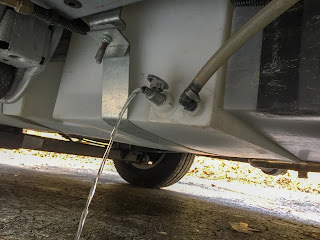
3a) Find the fresh water tank drain on the passenger side just forward of the rear wheel (where the water is dripping out in this photo).
3b) Open the valve by turning the handle 90 degrees.
3c) Let the residual fresh water drain out.
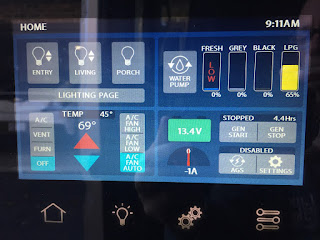
3d) Turn the water pump off.
3e) Open the sink faucets to let the pressure out of both the hot and cold water lines.
4) Bypass Your Water Heater
4a) Open the panel under the fridge with your Phillips #2 screwdriver.
Note: these are about the only screws in the rig that aren’t the Robertson square head screws commonplace in Canada.
This is how the valves looked under the access door set for summer use. We should have inspected these earlier. It looks like the dealer never opened the white re-circulation line when commissioning our van.
4b) Set the valves to bypass your hot water heater. You are reading along in your manual, right?
From the Pleasure-Way Owner’s Manual, page 28:
“Turn the bypass valves on the top red line, bottom blue line and the white center line to the closed position. (The handle is closed when it is turned 90 degrees to the water line.)
Open the valve that is located where the blue line coming up from the bottom and the red line coming down from the top are connected.”
This photo shows how we set our valves for winterizing.
5) Drain Your Water Heater
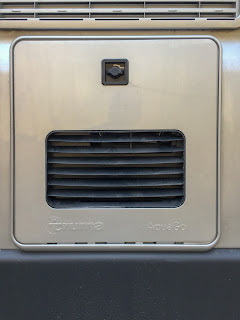
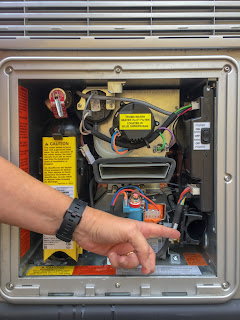
5a) Turn the latch and remove the Truma water heater door. Pull outward from the top. The bottom fits into slots in the frame and can be lifted out.
Here is the interior magic revealed.
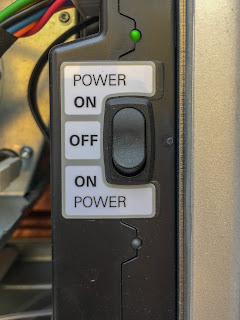
5b) Find the power switch in the upper right hand corner.
5c) Turn the switch from on (shown here) to the center off position.
5d) The power should now be off. Confirm this by looking a at the led just above the switch. It should not be illuminated.
5e) Locate the black latch at the top of the easy drain lever.
5f) Double check that you released the pressure in both hot and cold water lines by opening sink faucets before proceeding (remember 3e?). You do not want to get sprayed with water from a pressurized system.
5g) Okay, now go ahead and push up on the latch until it releases the yellow drain handle.
There is a video at the bottom of this post if that would help. Go ahead, scroll down, watch it now, and then come back to this step.
5h) Now pull down on the drain handle until it pops the water filter out of the heater. It takes a little bit of a push to get the tightly fitting filter to release.
note: There is a video at the end of this post showing Beth opening the lever.
5i) You will be rewarded with a contained waterfall as the small accumulator tank on the water heater drains out.
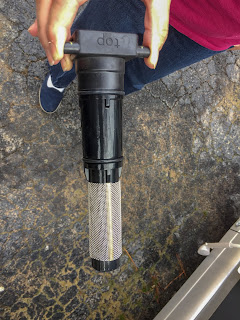
5j) Here’s what the filter looks like once removed. It is more of a screen than a filter. Go ahead and inspect the “O” rings and wash any sediment out of the screen. Refer to the Truma manual for more information. Ours was perfectly clean upon removal.
5k) The helpful Truma technician that spoke to us at the November 2018 Sarasota Pleasure-Way Rally recommended leaving the filter out over the winter. He also said to put it somewhere in the water heater compartment so it wouldn’t get lost. We found that it fit in the lower right corner.
5l) Close up the “easy drain lever”
5m) Put the exterior cover back on the compartment and turn the latch to secure it.
7) Anti-Freeze Time
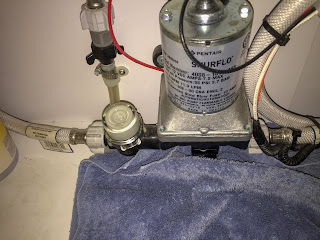
7a) Disconnect the water line from the inlet side of your pump, just before the water strainer.
We put a towel and a small bowl there to collect any water that might spill.
7b) Attach the siphon hose to your pump screen inlet.
7c) Put the other end into a gallon jug of RV/Marine non-toxic antifreeze.
7d) Close any faucets you opened earlier.
7e) Turn your water pump on.
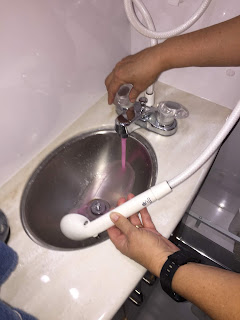
8) Make All Your Water Pink
8a) Run your sink faucet turned to hot until it runs pink, then again turned to cold until that runs pink.
8b) Depress the foot pedal on your toilet until pink water comes into the bowl.
8c) Run cold water in the bathroom sink until it comes out pink.
8d) Repeat for the hot water.
8e) Run the shower until the water comes out pink.
Don’t forget the outside shower!
8f) Run the cold water in the outside shower until that comes out pink.
8g) Repeat for the hot water.
This isn’t in the manual, but other owners mentioned getting water out of the city water fitting so it doesn’t crack.
8h) Gently pull out the screen from the city water connection.
8i) Standing to the side, depress the small white button in the middle and you should get a little water and pink stuff to spray out.
8j) Put the screen back in and close up the City Water inlet.
8k) It is also a good time to check that your propane switch is turned off.
8l) Turn off the water pump and disconnect the siphon hose.
8m) Reattach the original fresh water supply hose fitting and clean-up any spills.
Save some anti-freeze for step 9c.
9) Drain the Recirculation Line
9a) Locate the low point drains under the van, forward of the fresh water tank.
9b) Open the valve on the white water line by turning it 90 degrees. This line needs to be drained because it was bypassed with the water heater and didn’t receive any anti-freeze. The other two lines have anti-freeze in them and don’t need to be drained. We leave that one white valve open all winter.
9c) Pour 1/2 cup of anti-freeze into the drain in the galley sink.
9d) Pour 1/2 cup of anti-freeze into the drain in the bathroom sink.
9e) Pour 1/2 cup of anti-freeze into the shower-drain. That’s the last need for anti-freeze.
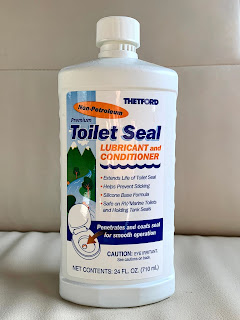
9f) With the pump off, depress the foot pedal to flush the antifreeze out of the toilet bowl. Now add 1/4 bottle of Toilet Seal Lubricant to the bowl. This will help extend the life of the toilet.
10) Disconnect Your Batteries
Now that your plumbing is protected, it is time to insure your expensive batteries are safe below 32° Fareneheit. These batteries can be damaged if charged during freezing temperatures. Read more about this in your manual, especially when it comes time to exercise your generator.
10a) Open the back doors and find the Red Key Charge Line Disconnect on the left side, under the couch, just above the batteries.
10b) Turn the key 90 degrees and remove it to prevent charging from the coach alternator or the solar panels.
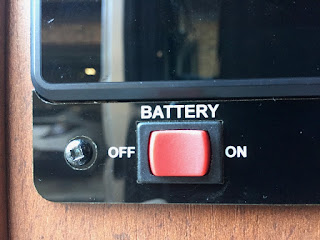
10c) Turn the 12 Volt Battery Disconnect Switch off under the control panel by the sliding door. Different from the Red Key Charge Line Disconnect, this switch prevents battery discharge while you aren’t using the coach.
Note: Look up the directions for “Exercising the generator in winter without charging the batteries” in your Lexor manual to insure you do it safely if you run the generator when your batteries are cold. In North Carolina we can wait for a day when temperatures are above freezing to exercise our generator.
10d) Remove any small batteries from flashlights, remote controls, or other items in your van so they don’t leak over the winter.
11) Go reward yourself with the beverage of your choice.
12) Please leave a comment if this was helpful or if you notice anything that could be improved.

