We have a Dometic RML 8330 3-way refrigerator in our RV. Annual maintenance includes cleaning the back of the refrigerator, especially the burner and ignitor. This year things didn’t look good, nor did the burner work well after cleaning. Here’s what we did to fix it…
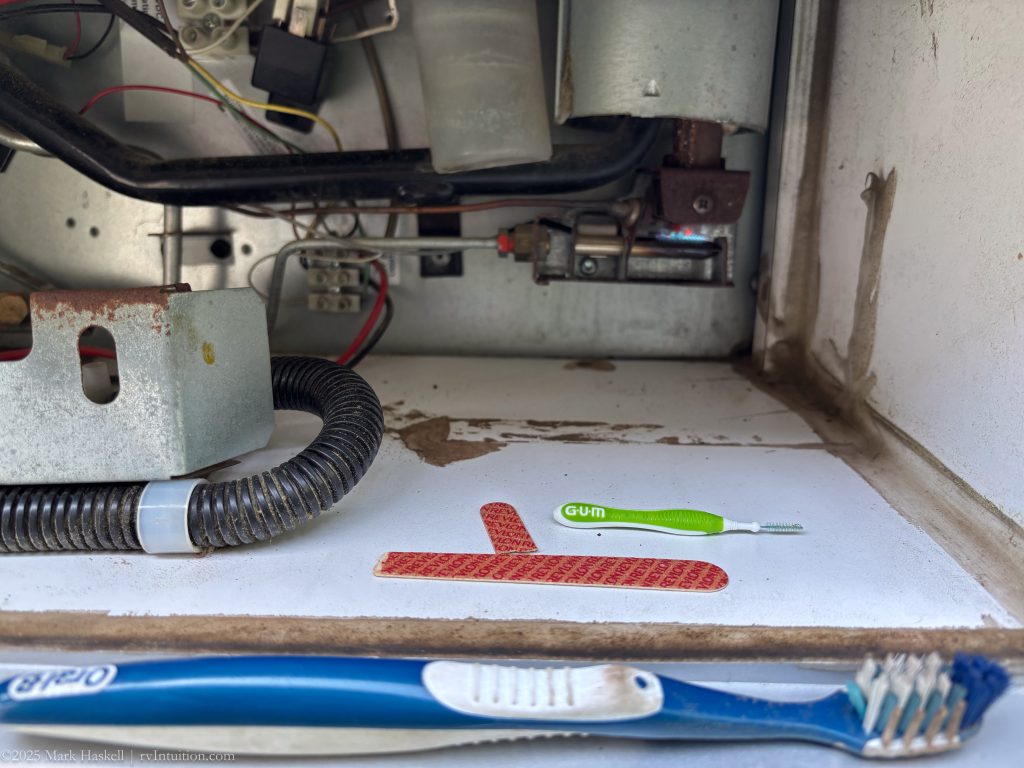
Cleaning Tools: A toothbrush to clean the burner and an emery board to (lightly)burnish the ignitor.
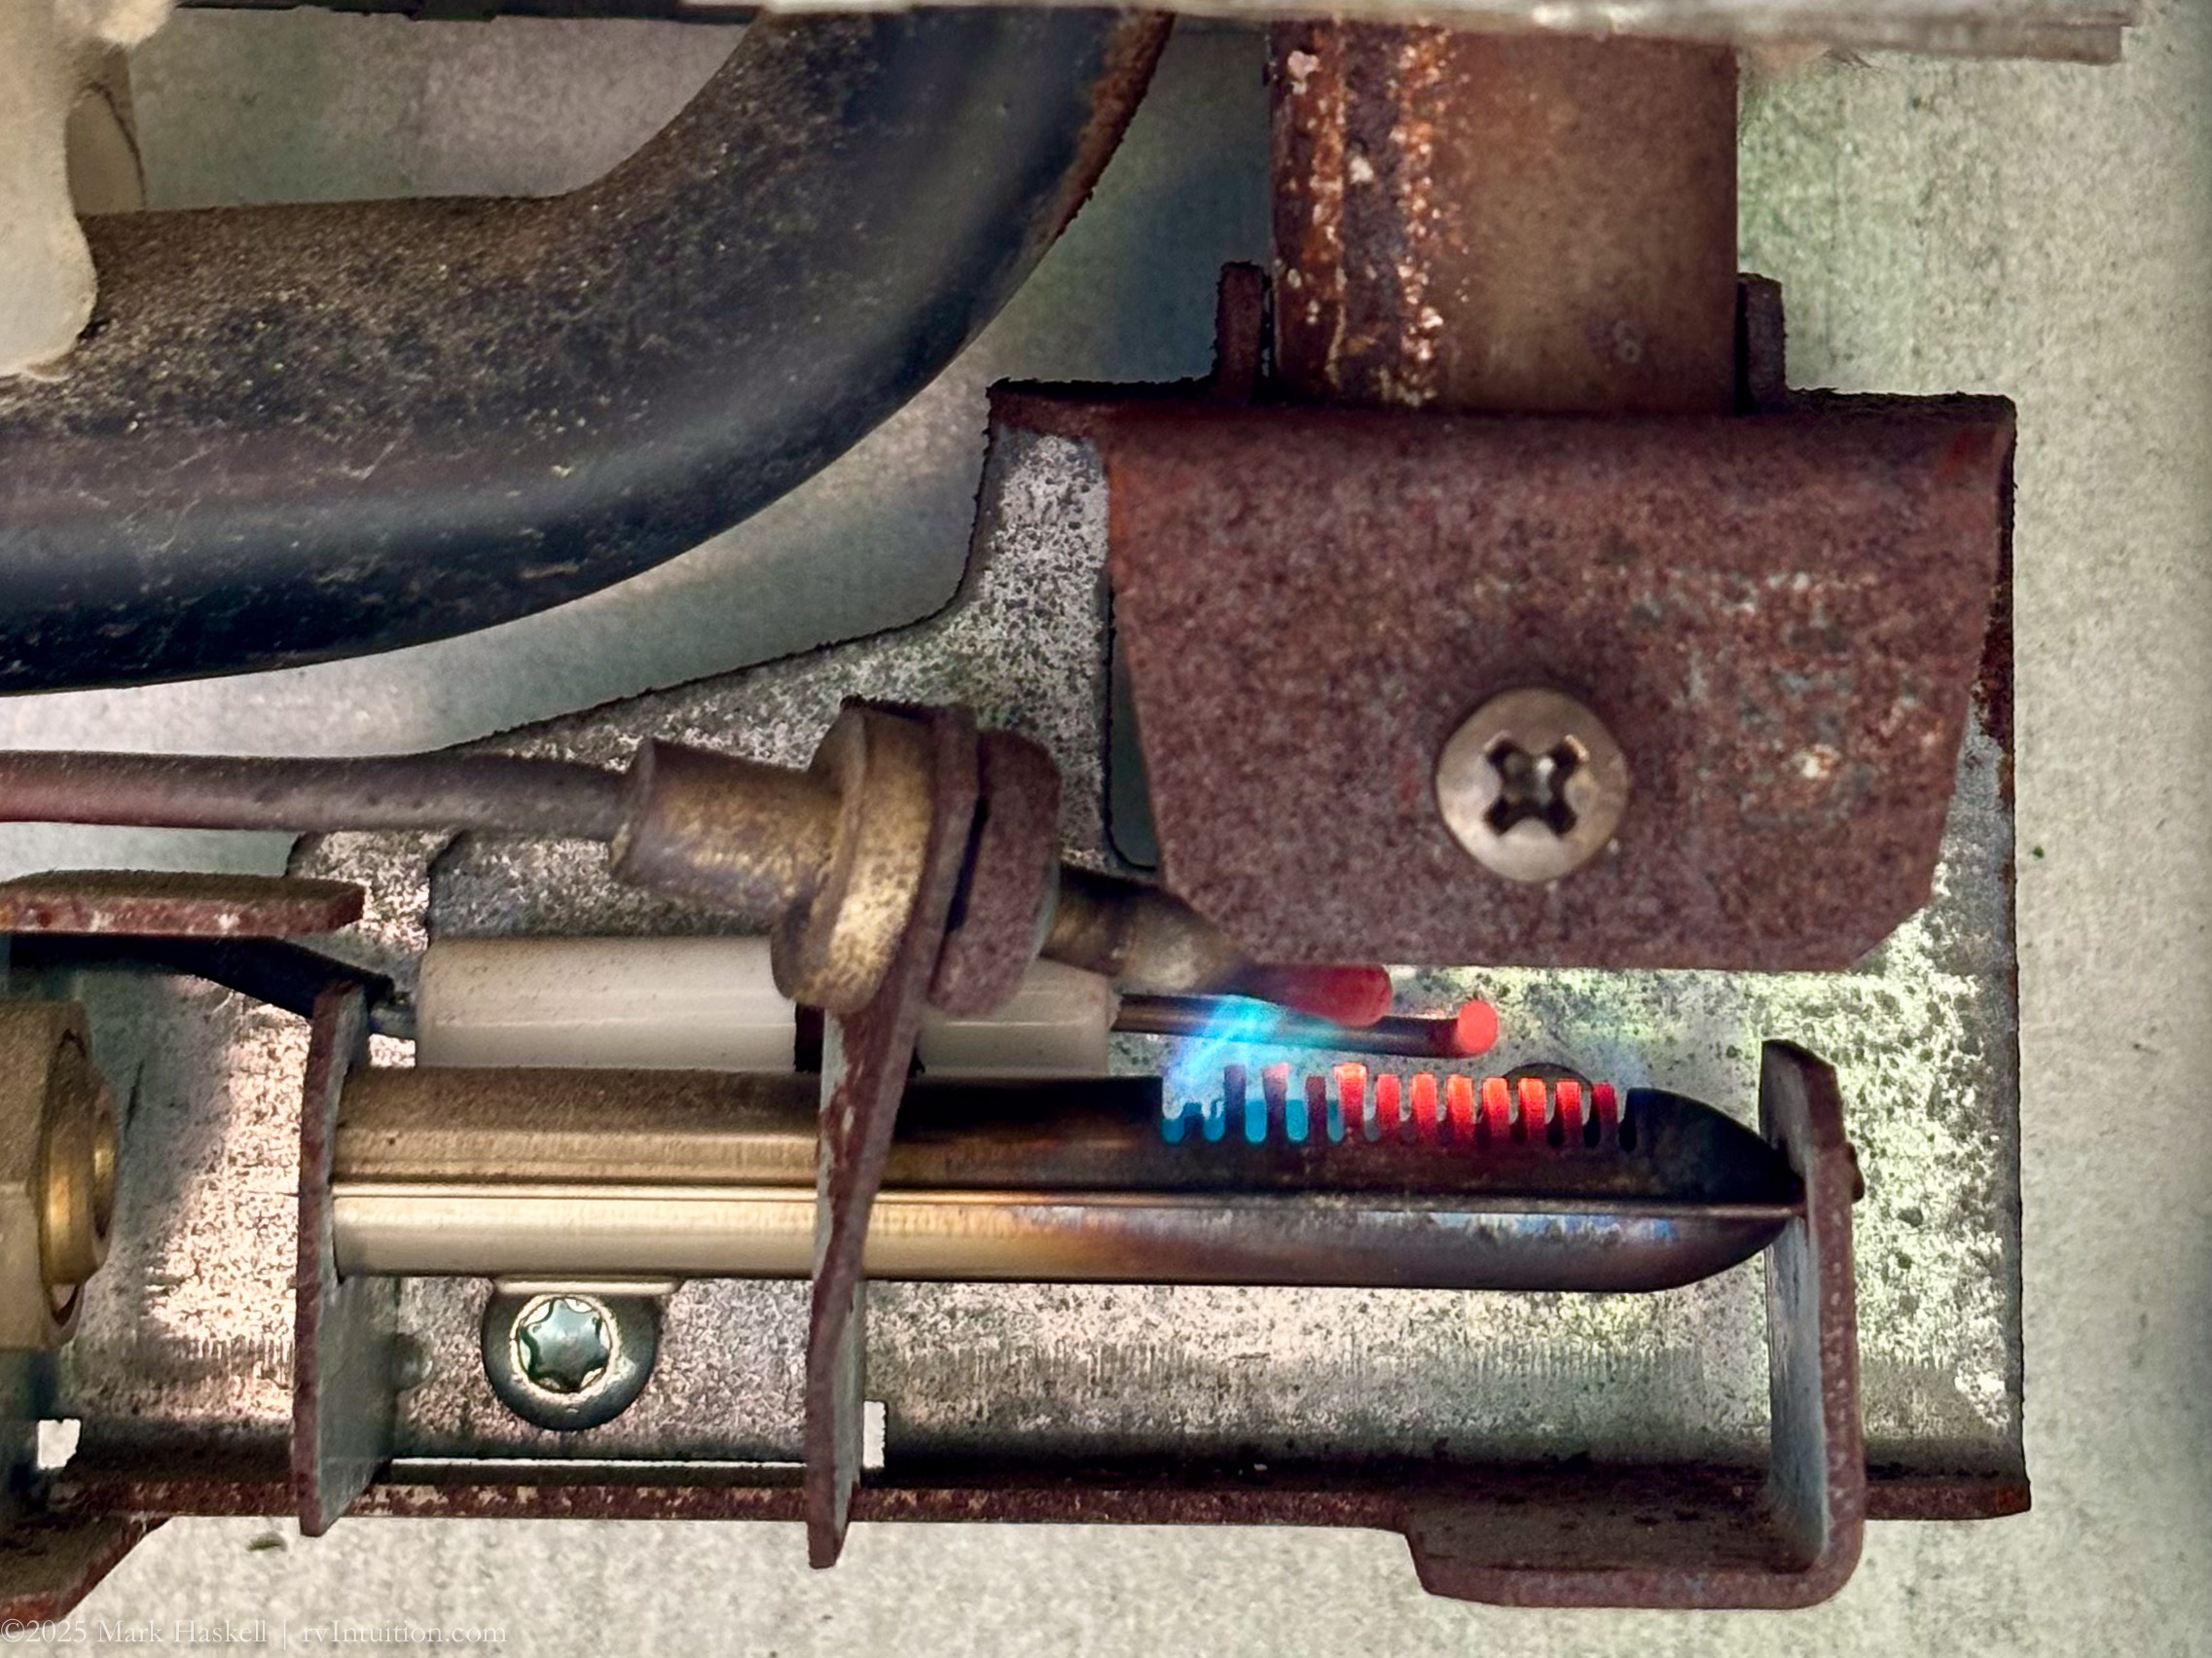
We cleaned the burner, as we do every spring, but the flame didn’t look as robust as it should.

Cooling was fine on shore power or DC, so the first thing that we thought to check was the propane pressure. Dometic recommends at least 11 psi. Internet searches suggested looking on the back of the refrigerator to find the specifications. I used a flashlight and mirrors to look for the sticker on the outside back of the fridge. Of course, this sticker is readily visible on the back wall inside of our RML 8330.
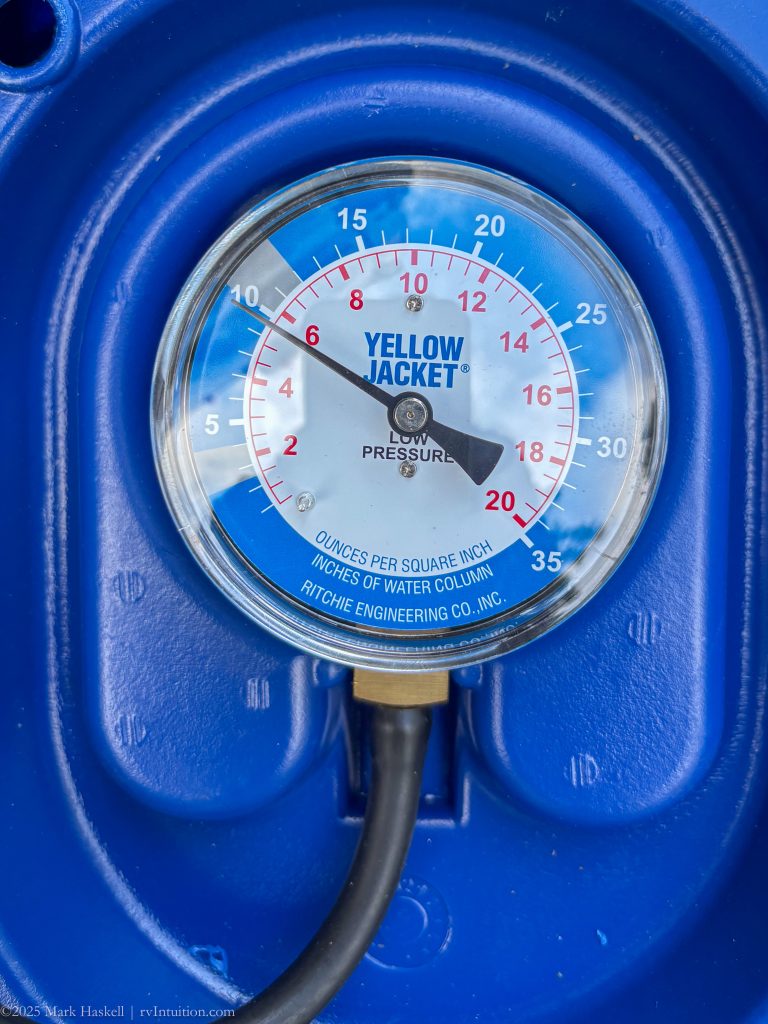

Checking the LP pressure at the BBQ port, it was only 10 psi. We Increased the LP pressure to 12 psi. The flame improved, but not by much. <For more info on how to check the propane pressure and adjust or replace a regulator, see this post: Under Pressure.>
Examining the flame more closely, we decided it was time to replace the burner. It was 7 years old and was used for 3-5 months every year. Whilst researching how to troubleshoot the problem, we found excellent help from fellow Pleasure-Way owner Doug Zielke. He’s done extensive research and experimenting with this refrigerator. Look for his posts, like this one, on the Pleasure-Way RV Group on Facebook.
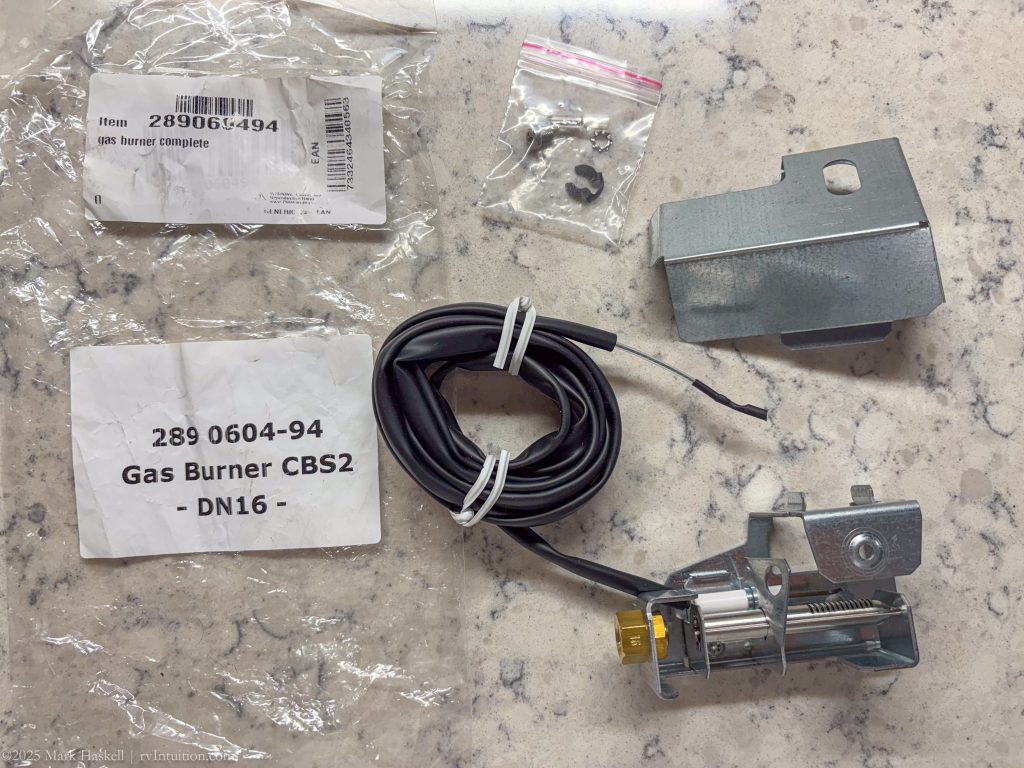
The new burner comes as part of this kit from Dometic. Sometimes parts are only available in Europe since the fridge was made in Germany, but we found the kit in Texas at United RV Parts. Here’s what we ordered: Dometic | OEM Refrigerator Gas Burner | 289060494 | Gas Burner with Ignitor Wiring. It was $249 in August of 2025.
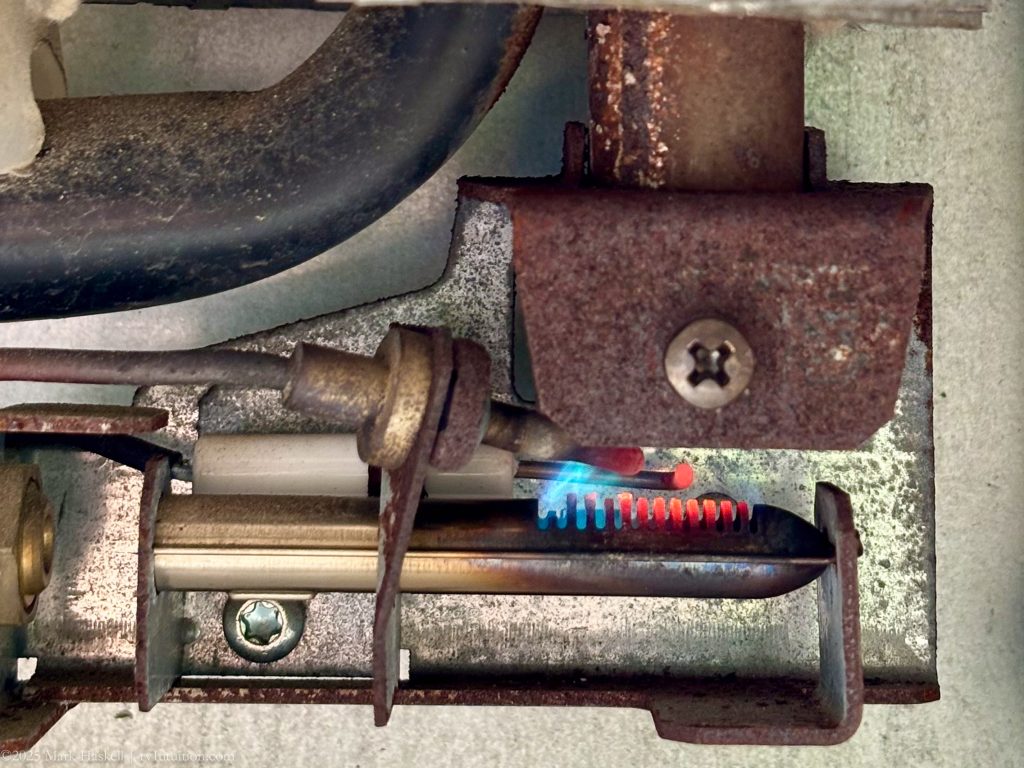
Replacing the burner was the right call! Here’s the new flame…
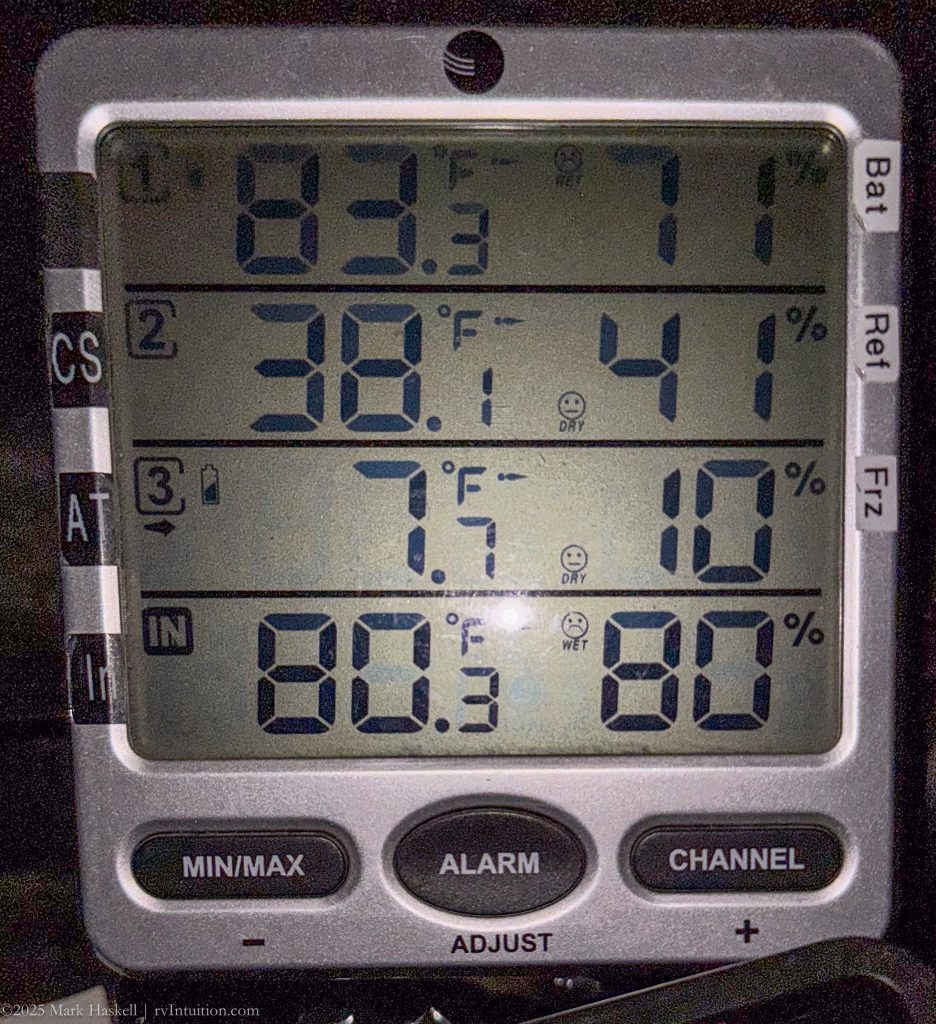
Temperature sensors showed the fridge at 38.1°F and the freezer at 7.7°F after running the refrigerator overnight on propane.
We are ready to leave for our summer trip!
More Info
For those that want to see the detailed replacement steps
For those that are interested in the details, here are the steps to replacing the burner assembly. Note that we aren’t certified RV techs, just owners trying to learn how to be able to repair our RV without waiting for an appointment repair shop.
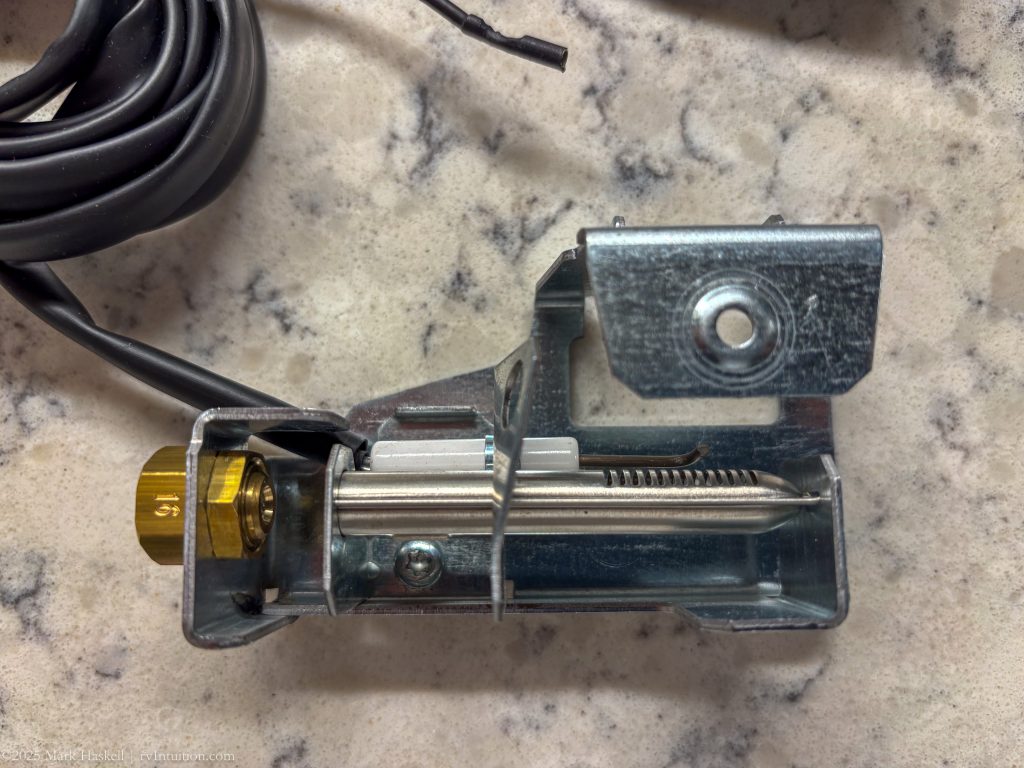
The kit contains a new ignitor, burner, and fasteners.
To get the old burner out:
1) Turn off the propane and run the stove to burn off what remains in the line.
2) Remove the cover from the burner. Pull down and forward on the tab on the bottom back of the cover.
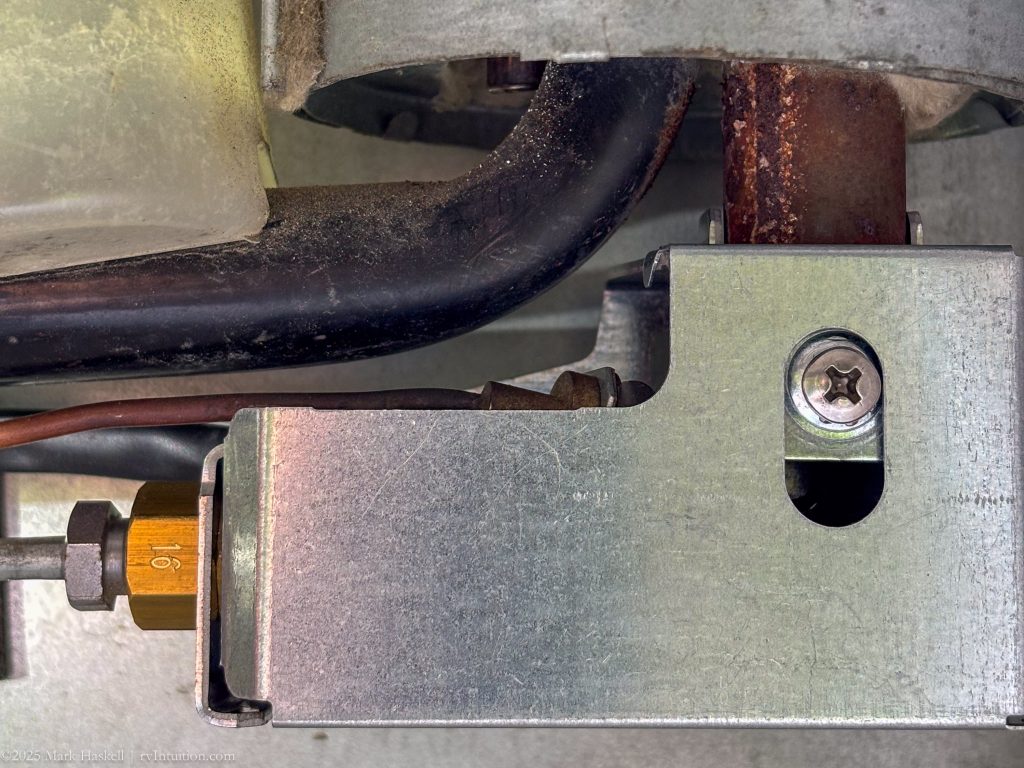
3) Remove the phillips screw and washer above the burner
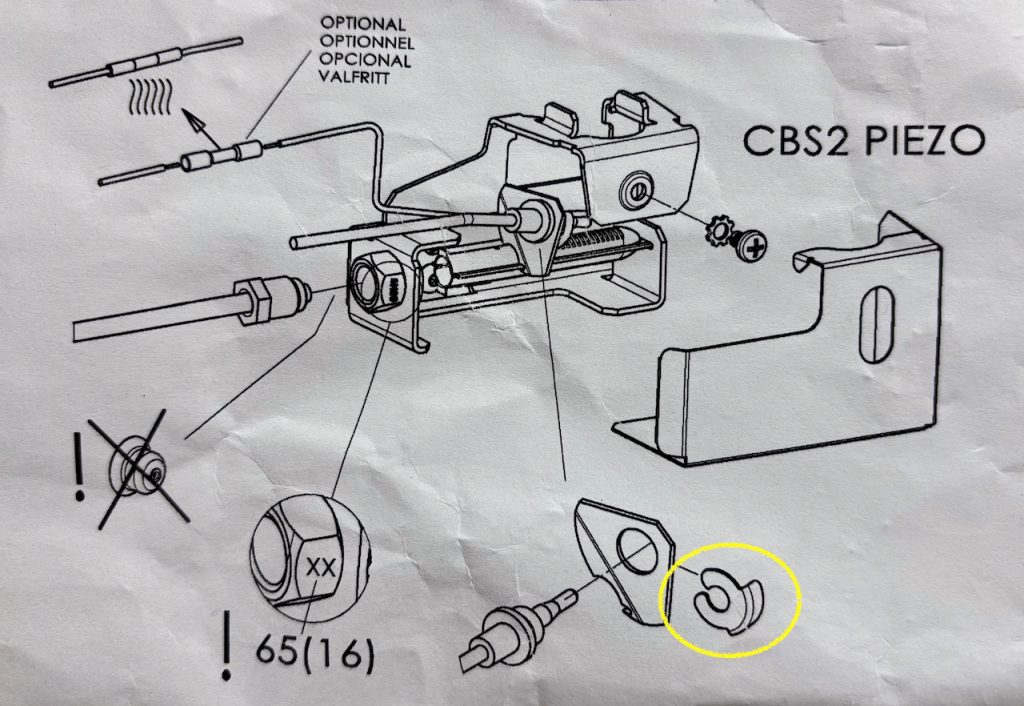
4) Pull the retaining clip that secures the thermocouple. We used needle nosed pliers.
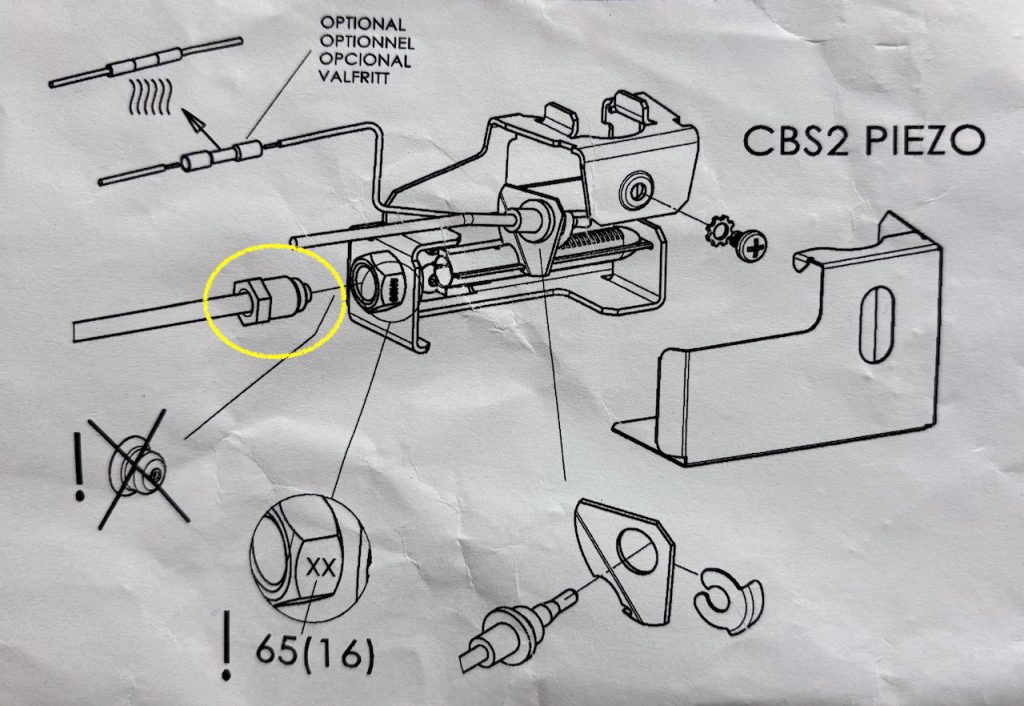
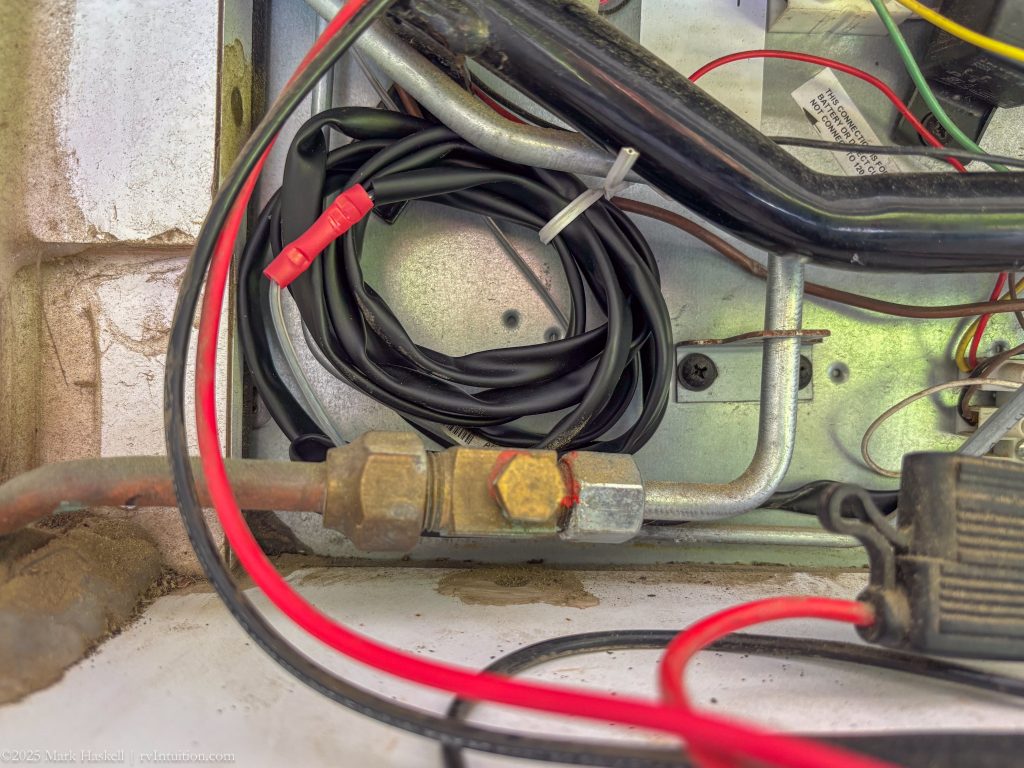
5) Unscrew the gas line coupling from the burner assembly.
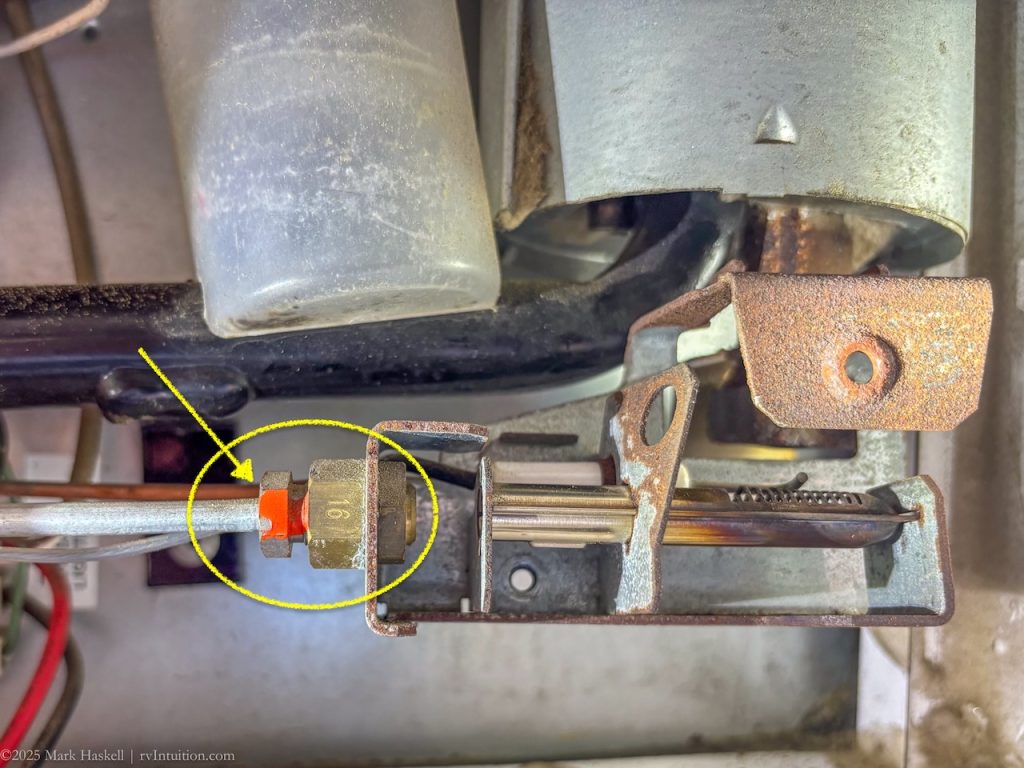
Unscrew the nut painted red, while holding the orifice marked “16”.
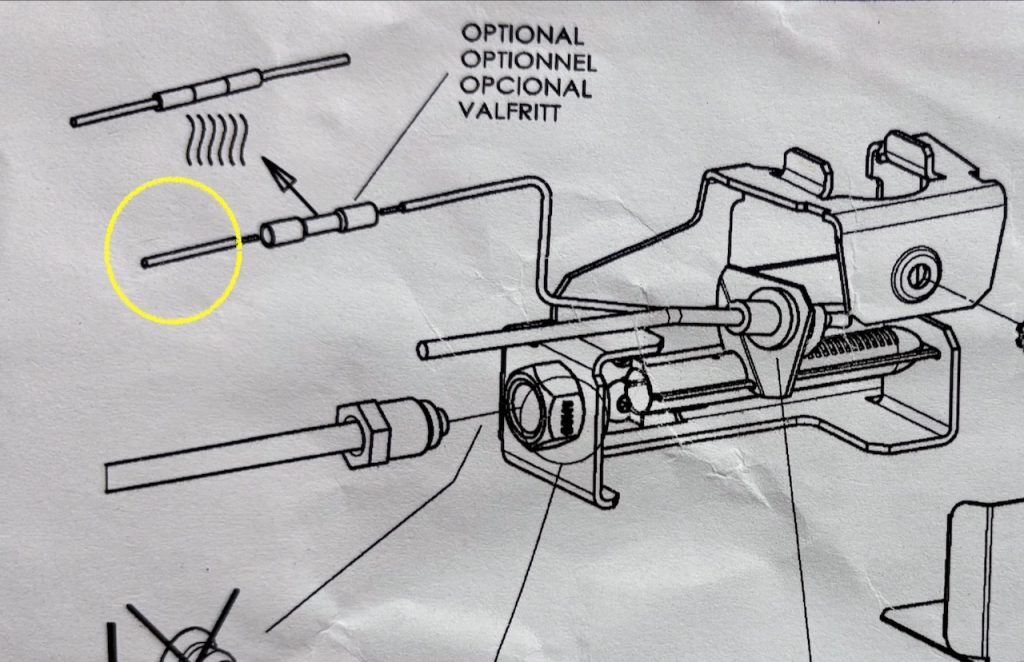
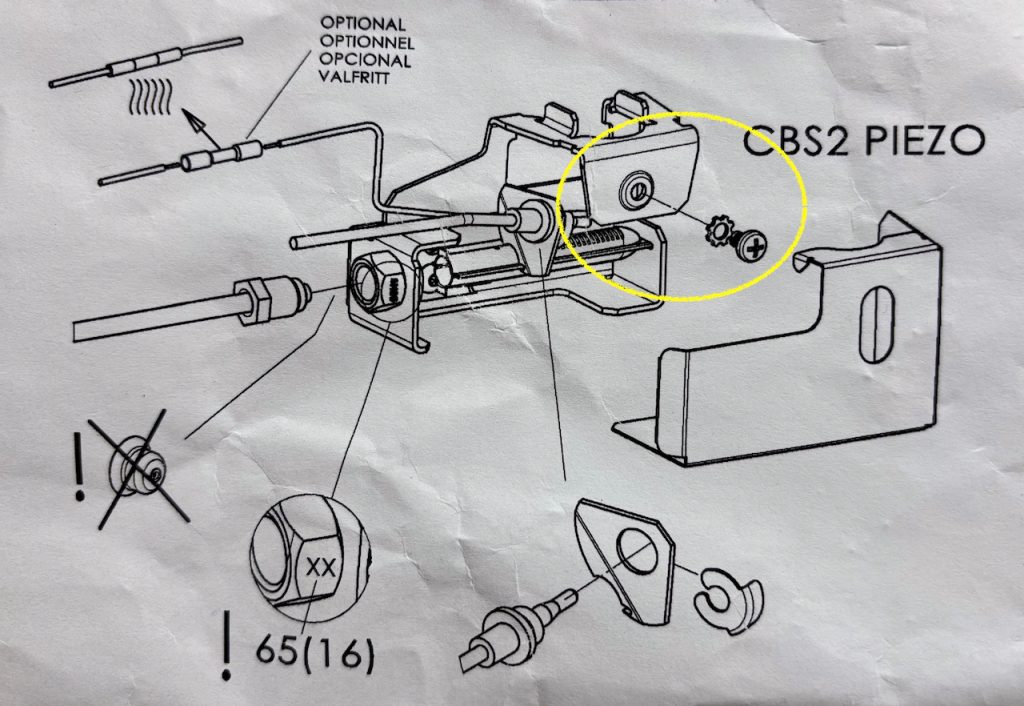
6) Cut the wire to the ignitor. Make sure to leave enough wire to splice in the new ignitor.
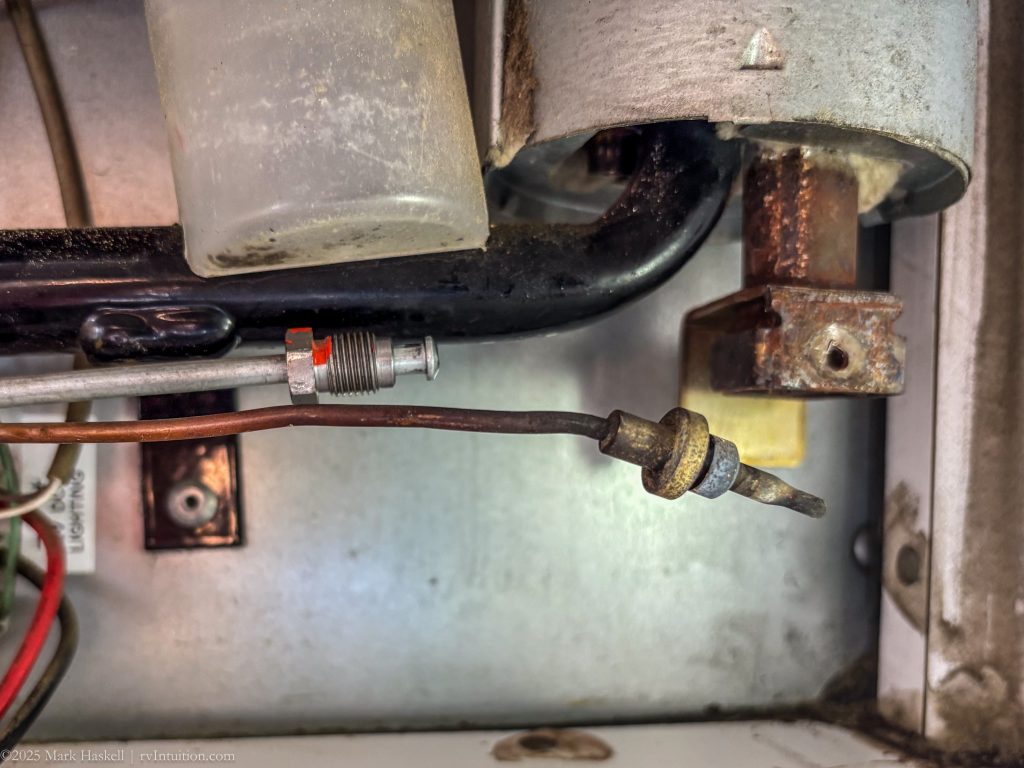
Here is what is left behind once the assembly has been removed.
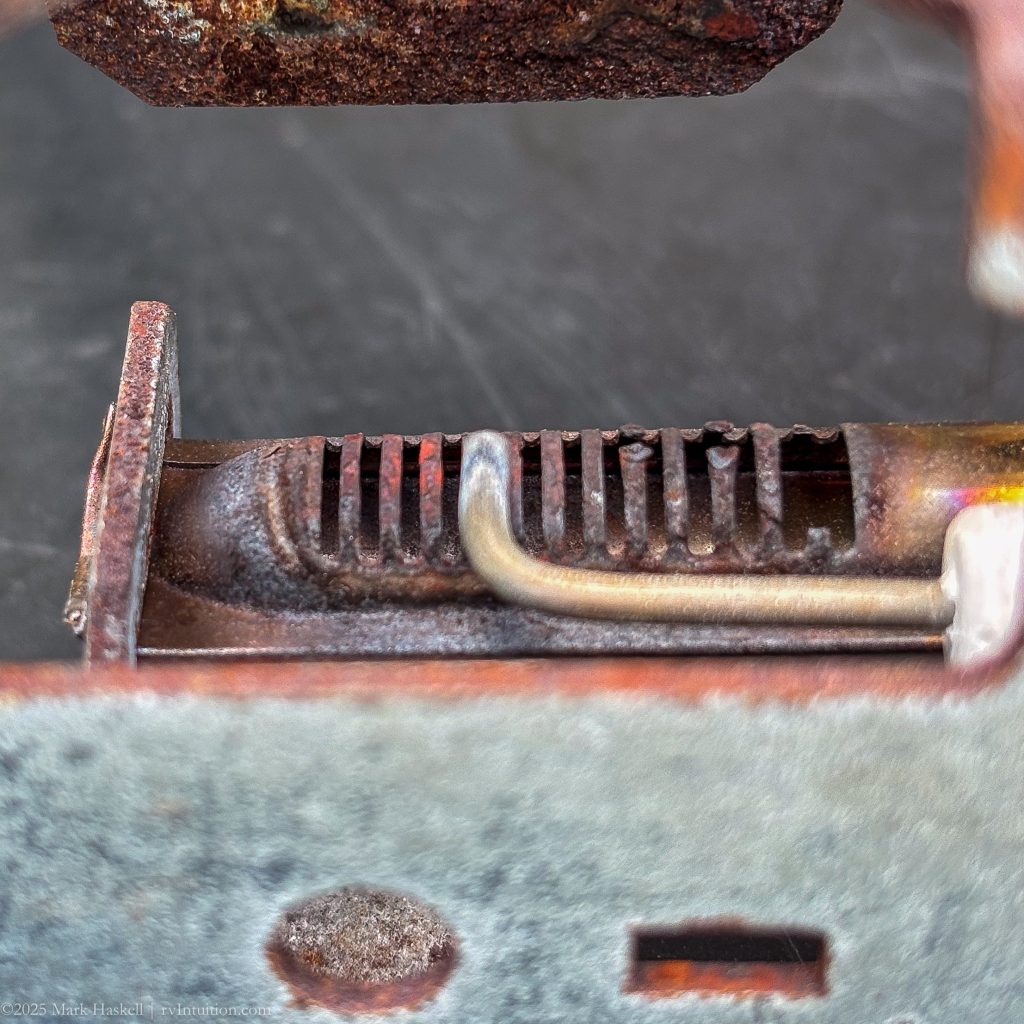
Looking closely at the old burner revealed several broken burner slots. It really was in rough shape.
Installing the new burner assembly is just the reverse of removing it.
- Reattach the gas line coupling.
- Reinsert the thermocouple and secure it with the new retaining clip.
- Screw the assembly to the refrigerator with the new washer and phillips screw.
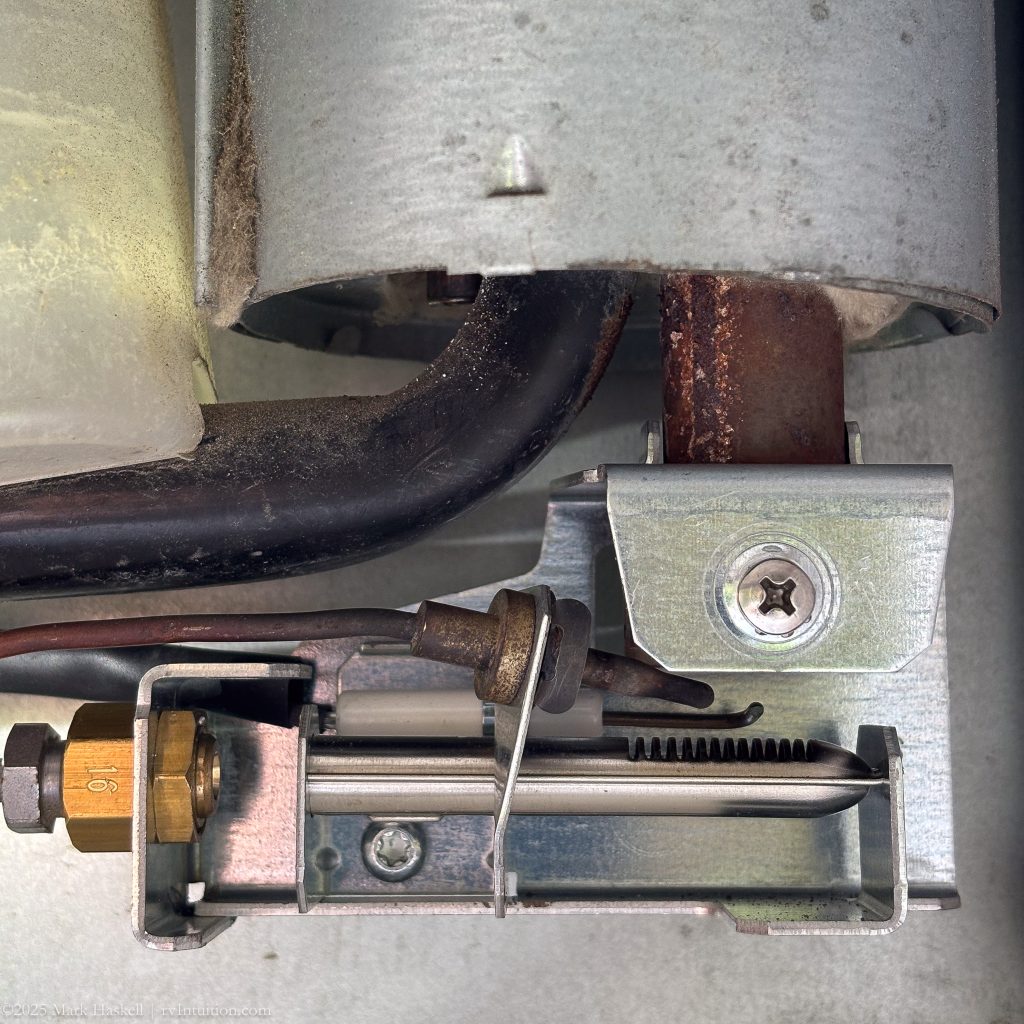
4. Splice the new ignitor wire to the old wire. We rolled up the excess and secured it with a wire tie.
To test the repair we turned on the gas, then listened and sniffed for propane before lighting the burner.
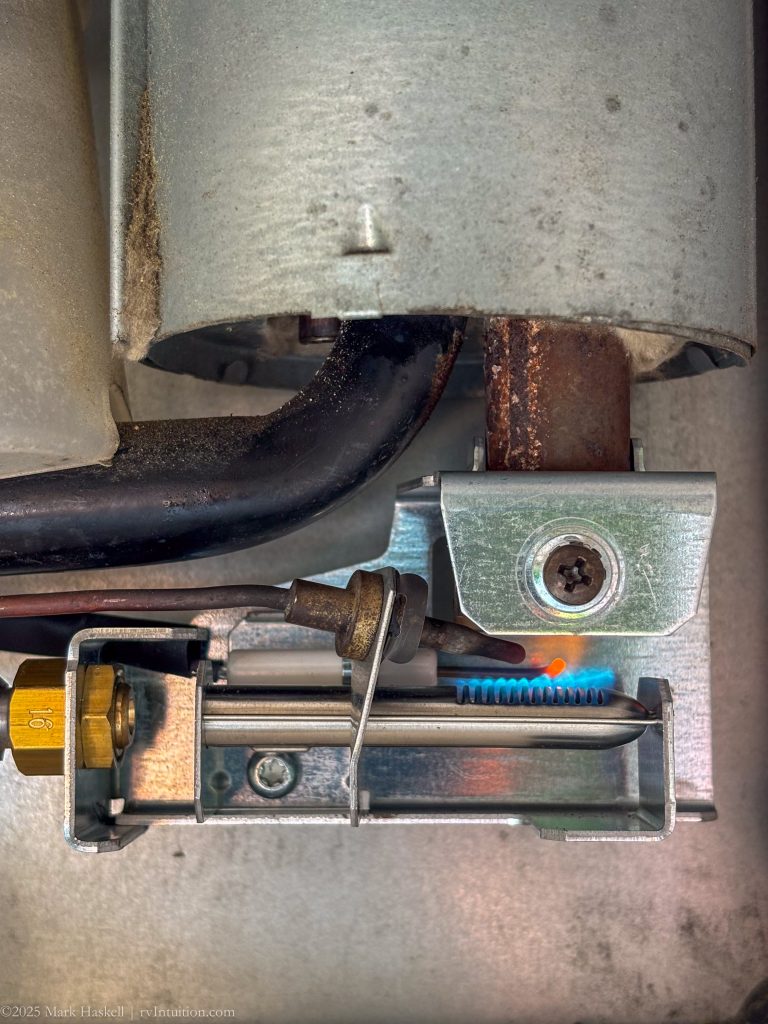
Check out this great looking flame!
The final step was to clip on the burner cover.
Thanks for following along! Please leave a comment or question, especially if you have experience with this refrigerator.
Leave a Reply