19 February 2023
Troubleshooting the Battery Charging System
On our way home from New York, we noticed that the house batteries weren’t
charging. This was apparent because we run our 3-way refrigerator on DC
power while driving and it was quickly drawing down our house batteries.
charging. This was apparent because we run our 3-way refrigerator on DC
power while driving and it was quickly drawing down our house batteries.
When the van engine is running, the alternator is the major source of
charging. It connects to the battery charger through a device called a
Battery Separator.
charging. It connects to the battery charger through a device called a
Battery Separator.
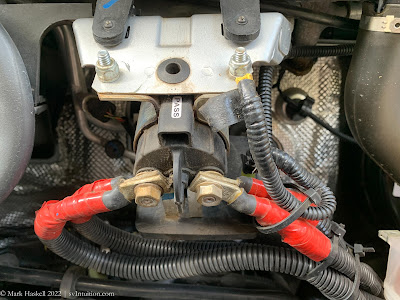
On our Ram Promaster based Pleasure-Way Lexor, the separator is an
easily accessible place to check voltages. Raising the hood reveals
the Separator hanging from a bracket in the back center of the the
engine compartment. Many class B RV’s use this same battery separator.
easily accessible place to check voltages. Raising the hood reveals
the Separator hanging from a bracket in the back center of the the
engine compartment. Many class B RV’s use this same battery separator.
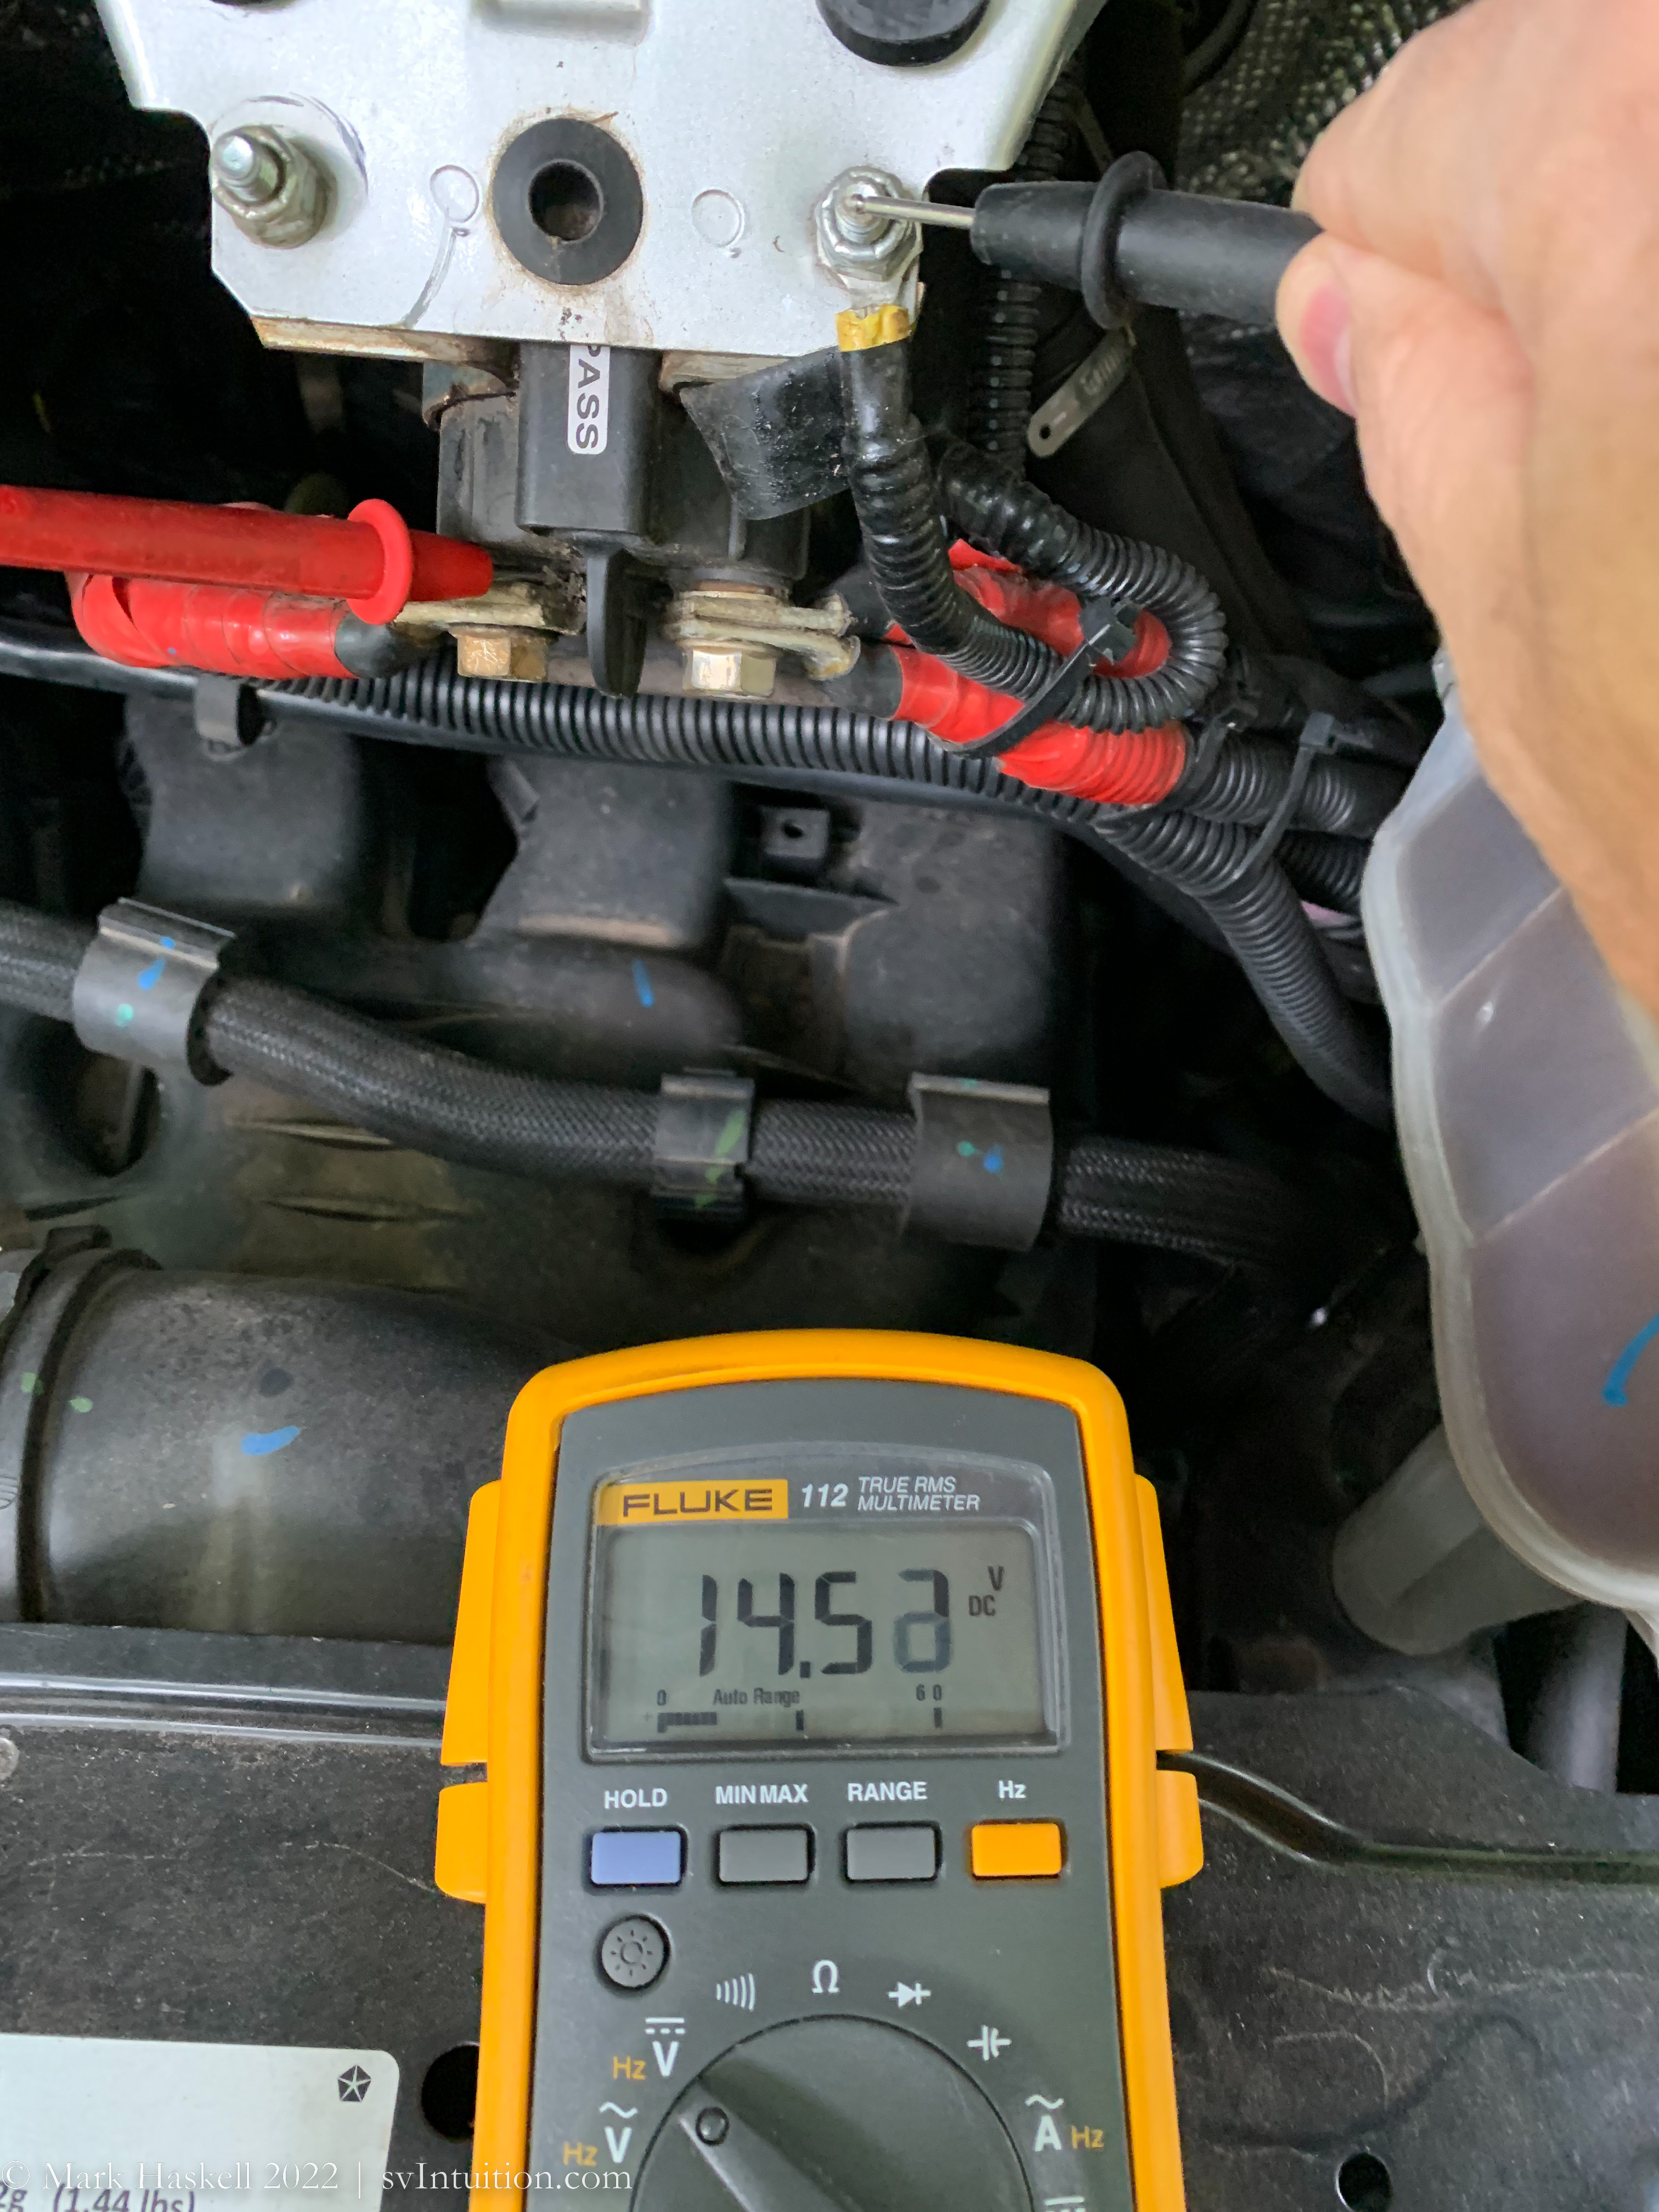
Checking voltages shows if the alternator is charging the house batteries.
In this photo (with the engine running) you can see that the voltage
coming from the alternator is 14.5 volts. The positive (red) probe is
connected to the left bolt on the separator and the negative probe is
connected to the ground bolt.
In this photo (with the engine running) you can see that the voltage
coming from the alternator is 14.5 volts. The positive (red) probe is
connected to the left bolt on the separator and the negative probe is
connected to the ground bolt.

Moving the positive probe to the right bolt, it should show the same voltage. In our case, it only read 13.3 volts.
What does a battery separator separate? It separates the house battery from the starting battery, insuring that the house battery won’t drain the starting battery.
The separator should connect the two sides to allow charging of the house battery when the engine is running (1) and this measurement showed it wasn’t working. The 13.3 volts is the resting voltage of our house batteries.
We could have called our RV dealer and scheduled a repair, but we thought we might be able to change it ourselves and learn a few things in the process.

Sure Power makes these Battery Separators. The new one is shown here. When installed, this side faces down so you can’t usually read it.
Replacing the Battery Separator isn’t difficult, but there is high
power involved, so be sure to disconnect the grounds of both the coach
and house batteries before proceeding. Without proper
precautions you could damage yourself and your rig.
power involved, so be sure to disconnect the grounds of both the coach
and house batteries before proceeding. Without proper
precautions you could damage yourself and your rig.
The best instructions I’ve seen are from Larry Mittell and can be
found in the files section of the Pleasure-Way Owners Group on
Facebook. Here’s a link:
Replacing the Battery Separator in a 2017 Lexor TS
found in the files section of the Pleasure-Way Owners Group on
Facebook. Here’s a link:
Replacing the Battery Separator in a 2017 Lexor TS
Even if you don’t normally use Facebook, this is a valuable group for
Pleasure-Way Owners.
Pleasure-Way Owners.

The ground wire connects to the separator with a slide on spade
connector shown in the smaller of the two circles. The other end
connects to the bolt shown in the larger circle.
connector shown in the smaller of the two circles. The other end
connects to the bolt shown in the larger circle.
The spade connector takes a little force to disconnect.

Disconnecting the four cables, all marked with red tape, we noticed
some corrosion. A brass wire brush was used to clean up the cable
ends.
some corrosion. A brass wire brush was used to clean up the cable
ends.
Once the cables are off, they should be secured so that they don’t
touch anything metal. After that, the two nuts that secure the
separator to the van can be undone. The ring connector for the
ground wire will slide off easily.
touch anything metal. After that, the two nuts that secure the
separator to the van can be undone. The ring connector for the
ground wire will slide off easily.
Pull the old separator out and replace it with the new one using the
same two bolts and nuts. Be sure to reinstall the ring connector and
plug the ground wire spade connector back in.
same two bolts and nuts. Be sure to reinstall the ring connector and
plug the ground wire spade connector back in.
The four power cables can be connected to the new separator just as
they were to the old one.
they were to the old one.
Pictured here, the completed installation with clean terminals,
restored charging of the house batteries while driving.
restored charging of the house batteries while driving.
Our separator failed after 4.5 years and 54,000 miles of use. If you
have a similar unit, you may want to add a spare to your
inventory.
have a similar unit, you may want to add a spare to your
inventory.
Addendum: Accessing the chassis battery

For reference, this is the cover to the chassis battery compartment
in the driver footwell. You will need to remove it to access the
chassis battery.
in the driver footwell. You will need to remove it to access the
chassis battery.

The cover is released by turning each fastener 1/4 turn. Here’s the
underside so you can see each fastner. They can be a bit finicky to
align. The photo shows them in the open position, ready to be
reinstalled.
underside so you can see each fastner. They can be a bit finicky to
align. The photo shows them in the open position, ready to be
reinstalled.
References
The 1314-200 (unidirectional) is a 200A battery separator module with an integrated relay for 12V systems. The unit monitors both the main (starting) and auxiliary (house) battery banks. If the main battery is above the connect threshold, the relay connects the two banks together. If the main battery is below the disconnect threshold the unit will open the relay. The connect threshold is set to a nominal voltage of 13.2V, which would only be reached when the charging system is operating. This will cause the relay to close and the charging system can charge both banks of batteries. The disconnect voltage is set to a nominal 12.8V, which is near the full charge resting voltage of the batteries. This will cause the relay to be opened shortly after the engine is stopped, attempting to preserve 100% of the starting battery capacity for engine cranking. When the engine is started, the start signal causes the controller to check if the auxiliary battery is within about 0.85V of the main battery; if so, the relay contact is closed. Thus providing the starter system with maximum battery voltage available.
Note: We updated the installation in June of 2025 to use a DC to DC charger and eliminate the battery separator as PW did on newer models. I’m working on a new post for that and will add a link when complete.